How to Deploy an OpenClaw AI Agent on a Cloud GPU Server
Want to build your own AI assistant that writes code, analyzes data, manages infrastructure, or tackles other complex tasks? OpenClaw is a flexible platform for creating autonomous AI agents, supporting any model—from public APIs to your private LLM endpoints.
By hosting a GPU-powered cloud server at immers.cloud, you get a ready-to-use environment for running OpenClaw — no need to deal with drivers, dependencies, or hardware setup. It’s the perfect solution for developers who want a powerful, preconfigured server without spending time on infrastructure maintenance.
OpenClaw is already available in our image marketplace. Setup doesn’t require deep technical expertise — just follow this simple guide.
When creating a virtual machine with the OpenClaw image on Ubuntu 24.04, a preset configuration for Qwen3-Coder-Next is automatically inserted into the User Data field.
⚠️ Important: the image itself does not contain a pre-saved configuration—it is added only when creating the virtual machine via the web interface.
If you want to use a different model, edit the configuration file after launch as described below.
Launch a Virtual Machine with a GPU
Go to the immers.cloud control panel and create a virtual machine:
- Select the OpenClaw image;
- Choose a suitable configuration (a CPU server with at least 2 cores and 8 GB RAM is recommended);
- Adjust CPU, RAM, and disk size as needed;
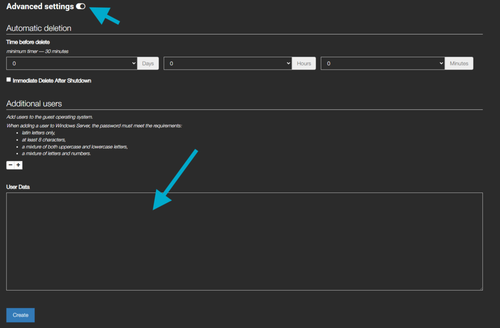
- Click Advanced settings and paste the configuration below into the User data field to connect OpenClaw to a public LLM endpoint;
- Click Create — your server will be ready in a few minutes.
Configuration for connecting OpenClaw to a public LLM endpoint (using Qwen3-Coder-Next as an example):
Note: Currently, among public endpoints, only Qwen3-Coder-Next supports OpenClaw.
Copy the entire text below unchanged into the User data field:
## template: jinja

#!/bin/bash

OPENAI_ENDPOINT="https://chat.immers.cloud/v1/endpoints/qwen3-coder-test/generate/"

OPENAI_API_KEY="YOUR TOCKEN"

MODEL_ID="Qwen3-Coder-Next"

MODEL_NAME="Qwen3-Coder-Next"

MODEL_CONTEXT="262144"
cat > /home/ubuntu/.immersopenclaw/customdata <<EOF

{

  "models": {

    "mode": "merge",

    "providers": {

      "${MODEL_NAME}": {

        "baseUrl": "${OPENAI_ENDPOINT}",

        "apiKey": "${OPENAI_API_KEY}",

        "api": "openai-completions",

        "models": [

          {

            "id": "${MODEL_ID}",

            "name": "${MODEL_NAME}",

            "reasoning": true,

            "input": ["text"],

            "cost": {"input": 0, "output": 0, "cacheRead": 0, "cacheWrite": 0},

            "contextWindow": ${MODEL_CONTEXT}

          }

        ]

      }

    }

  },

  "agents": {

    "defaults": {

      "compaction": {

        "mode": "safeguard"

      },

      "maxConcurrent": 4,

      "model": {

        "primary": "qwen3-coder-test/${MODEL_ID}"

      },

      "subagents": {

        "maxConcurrent": 8

      },

      "workspace": "/home/ubuntu/.openclaw/workspace"

    }

  }

}

EOF
echo "Successfully done!"
OPENAI_ENDPOINT="https://chat.immers.cloud/v1/endpoints/qwen3-coder-test/generate/" — specifies the endpoint URL
OPENAI_API_KEY="YOUR TOCKEN" - your personal token obtained from the token management page
MODEL_ID — the unique identifier of the model
MODEL_NAME — the display name of the model
MODEL_CONTEXT — the model’s context window size (in tokens)
This image already includes OpenClaw 2026.2.6-3 and NGINX 1.24.0 (configured as a reverse proxy), so no additional installation is required.
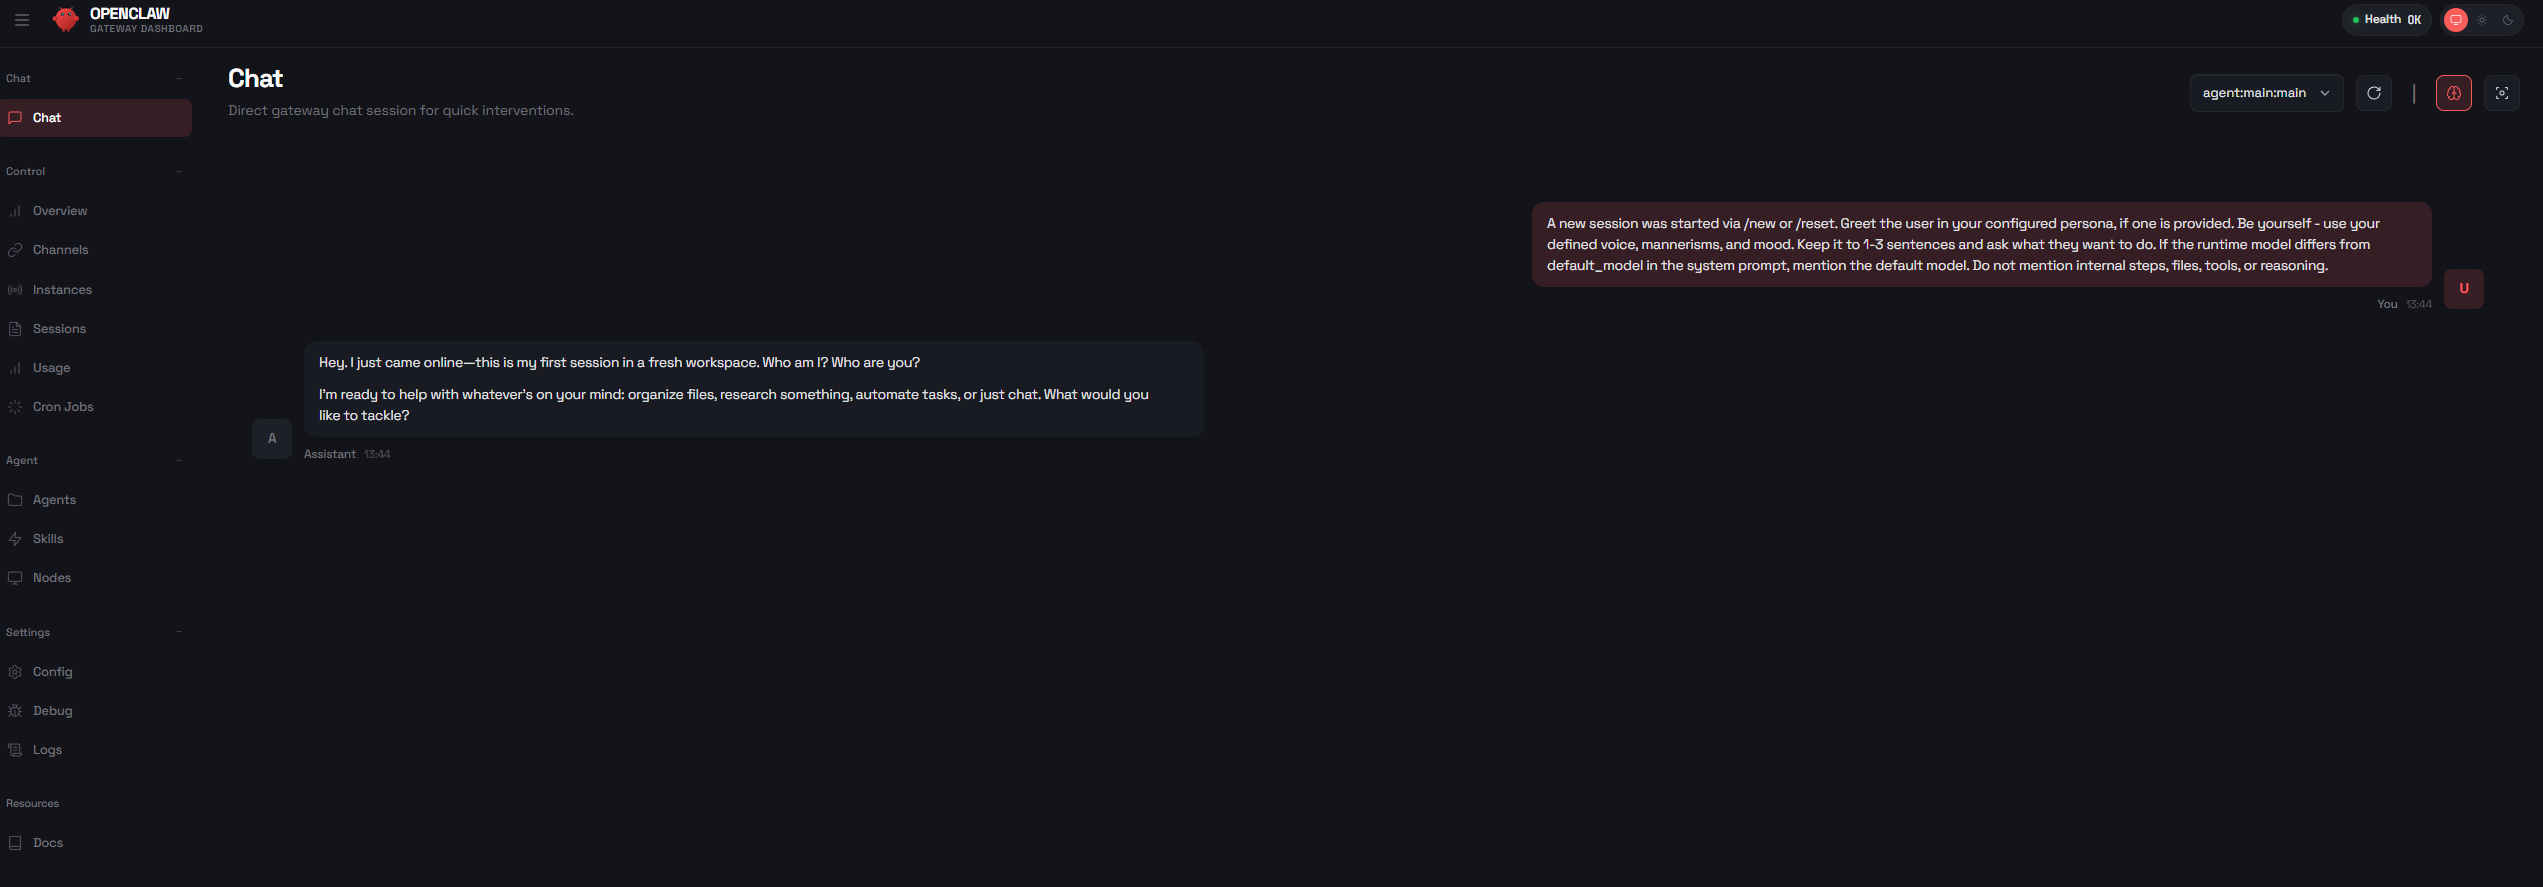
Once the server starts, wait for the OpenClaw link to appear in the Addresses section on your VM’s page. Clicking it will take you directly to the OpenClaw Control web interface.
Optional: Connect Your Own AI Model
To connect your own model, before creating the server, edit the User Data section (as shown in the public LLM endpoint setup above) and fill in the following fields:
OPENAI_ENDPOINT— the URL of your chosen endpointOPENAI_API_KEY— your personal token obtained from the immers.cloud websiteMODEL_ID— the unique identifier of your modelMODEL_NAME— the display name of your modelMODEL_CONTEXT— the context window size (in tokens)
You can also add custom parameters in the configuration section to apply them to your OpenClaw config file on server startup.
Save the settings and restart OpenClaw if necessary.
Done! Your AI agent can now leverage GPU power to perform tasks with high speed and accuracy.
Save the file and restart OpenClaw if necessary.
Done! Your AI agent can now leverage GPU power to perform tasks with high speed and accuracy.
Benefits of this approach:
- Full privacy: The model runs through your private endpoint — data never leaves the cloud;
- Scalability: As workload grows, you can easily upgrade to a server with 2 or 8 GPUs;
- Time savings: No need to manually assemble a GPU server platform—everything is preconfigured;
- Flexibility: You can connect any model—even those using the Completions API format, which is especially valuable in the open-source ecosystem.
Why choose GPU cloud server hosting at immers.cloud?
- Access to servers with powerful NVIDIA GPUs (RTX 4090, A100, H100, H200, and more);
- Preinstalled images for a wide range of use cases;
- Pay-as-you-go billing — you pay only for the time your server is running;
- Full data control—no code or data sent to external clouds;
- Support for GPU-enabled virtual machines and native OpenStack API.
This makes immers.cloud one of the best GPU cloud platforms for developers, researchers, and AI-focused companies.